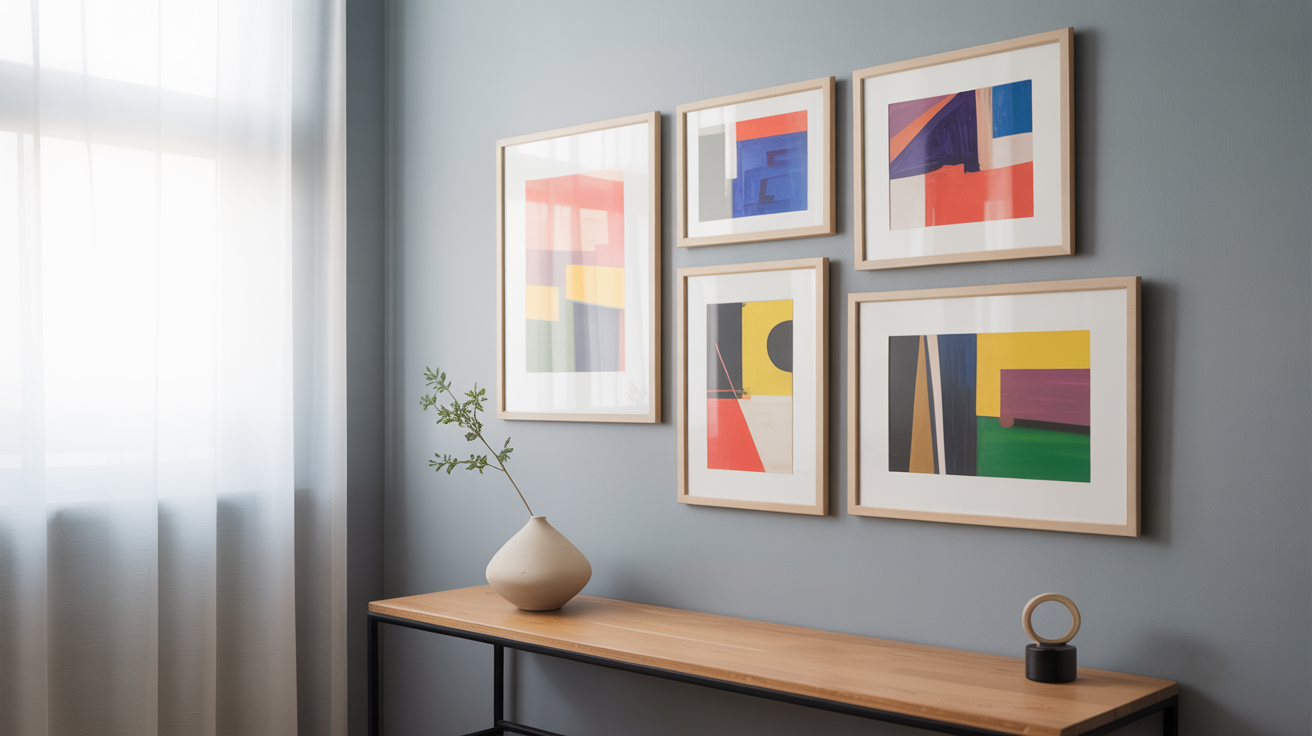
DIY Wall Gallery Layouts Without Messing Up
nadine
- September 17, 2025
- 6 min read
Hey friend! Have you ever stared at a blank wall, daydreaming about creating a stunning gallery but immediately panicked at the thought of hammering random nails and ending up with a chaotic mess? Yup, I’ve been there too. 😅 Trust me, DIY wall galleries can be simple, stress-free, and seriously impressive—if you know a few tricks. Today, we’re talking about wall art layout, picture hanging tips, and home styling DIY ideas to get that perfect gallery wall without second-guessing every nail.
Whether you’re looking to showcase family photos, artwork, or quirky prints, I’ll guide you through DIY wall gallery layouts without messing up—so your wall looks intentional, balanced, and totally Instagram-worthy.
1. Start with a Plan: Measure, Sketch, and Visualize
Before you even touch a hammer, plan your wall gallery carefully. Skipping this step is the fastest route to crooked frames and regret.
Steps to Plan Your Gallery Wall
- Measure the wall space: Know the height and width. This prevents overfilling or leaving awkward gaps.
- Sketch your layout: Use graph paper or a simple digital tool. Visualizing placement saves a lot of headaches.
- Consider the furniture: Your gallery shouldn’t float awkwardly above a sofa or dresser. Leave 6–12 inches of space above furniture.
Personal anecdote: I once ignored measurements and ended up with a “modern art explosion” that looked like a toddler attacked my wall. Lesson learned—always plan first.
2. Choose a Cohesive Theme
A gallery wall looks intentional when there’s a common thread tying everything together.
Theme Ideas
- Color scheme: Stick to black-and-white photos or a complementary color palette.
- Frame style: Mix and match cautiously—too many styles can feel chaotic.
- Subject matter: Family photos, travel memories, or abstract prints. Pick one main theme.
FYI: I love mixing frames with similar tones and materials. It gives character without turning into a visual circus.
3. Gather Your Frames and Artwork
Once your theme is set, it’s time to gather materials. Quality frames can elevate even the simplest prints.
Tips for Choosing Frames
- Mix sizes: Combine large and small frames for visual interest.
- Use a variety of orientations: Horizontal and vertical frames break monotony.
- Don’t forget mats: Mats can unify different prints and prevent overcrowding.
Pro tip: I found cheap frames at thrift stores, painted them white, and suddenly my gallery looked boutique-level fancy. Budget-friendly wins!
4. Experiment with Layout on the Floor First
Before hammering anything, lay out your frames on the floor. Seriously—it saves tears, crooked lines, and wasted nails.
Floor Layout Tips
- Arrange the largest frames first.
- Fill gaps with medium and small frames.
- Take a photo from above to get a digital preview.
Personal anecdote: I spent an entire evening moving frames around the living room floor. My cat “helped” by stepping on everything. Still, seeing the floor layout helped me hang everything perfectly later.
5. Use Templates and Paper Cutouts
Here’s a trick I swear by: use paper templates to avoid guesswork.
How It Works
- Trace your frames on craft paper.
- Tape the paper to the wall with painter’s tape.
- Move templates until the layout feels right.
- Hammer nails through the paper.
FYI: This method saved my walls from 50 unnecessary holes. Less mess, more zen.
6. Mind the Spacing
Even spacing keeps your gallery wall balanced and visually appealing.
Spacing Tips
- Standard gap: 2–5 inches between frames works well.
- Clustered vs. spread out: Clusters feel cozy; wider spacing feels airy.
- Step back frequently: Stand back and assess the arrangement as you go.
Pro tip: I usually start with 3-inch gaps. It’s enough separation without looking disconnected.
7. Level and Hang with Confidence
Crooked frames are the quickest way to ruin a gallery. Use the right tools to get it straight the first time.
Hanging Tools
- Level: Essential. Don’t skip it, even if you think you have a “good eye.”
- Tape measure: Ensures consistent spacing.
- Hammer and nails or picture hooks: Choose hooks rated for your frame weight.
Personal insight: I used to eyeball frames and ended up adjusting daily. Now, a level and pre-planned nails save me constant readjustments.
8. Mix and Match for Personality
Don’t be afraid to mix prints, textures, and frame styles, but do it with purpose.
Creative Ideas
- Add mirrors: Small mirrors reflect light and open up the space.
- Incorporate shelves: Use floating shelves to display 3D objects or small plants.
- Use typography prints: Inspirational quotes can add a fun twist.
FYI: I mixed a mirror with framed photos, and suddenly my tiny hallway felt larger and more inviting.
9. Consider the Wall Color
Your frames won’t shine if the wall color clashes. Consider contrast and harmony.
Wall Color Tips
- Light walls: Dark frames pop beautifully.
- Dark walls: Light or metallic frames add elegance.
- Neutral palette: Stick with soft tones to allow artwork to stand out.
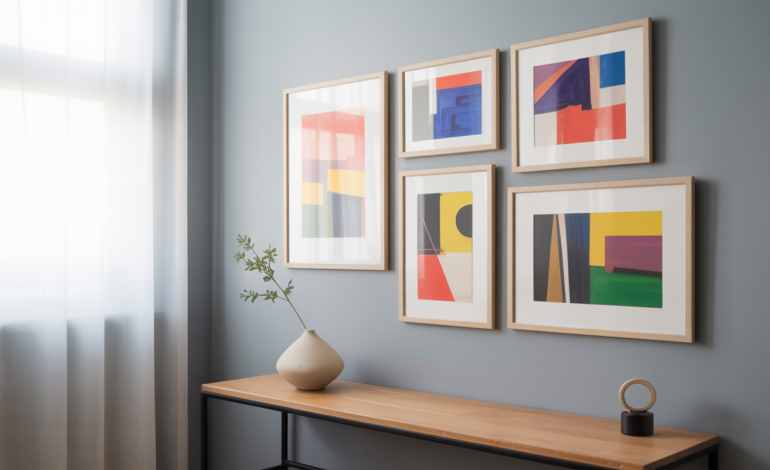
Personal anecdote: My white frames on a pale gray wall made my prints the star. Contrast works wonders!
10. Keep a Balanced Visual Flow
Balance is key. Your gallery shouldn’t feel lopsided or chaotic.
Tips for Flow
- Place the largest frame near the center or off-center for a dynamic feel.
- Avoid grouping all large or all small frames together.
- Vary heights slightly but maintain alignment along invisible lines.
Pro tip: Imagine invisible grids or lines connecting tops or centers of frames—it guides placement naturally.
11. Add Personal Touches
A gallery wall should feel like you, not a magazine.
Ideas for Personal Touch
- Family photos mixed with travel prints.
- DIY artwork from kids or yourself.
- Mementos in shadow boxes for depth.
FYI: I added a small handmade embroidery piece from my grandma—it became the focal point and conversation starter. Personal touches matter.
12. Maintain and Refresh Over Time
A wall gallery isn’t static; it can evolve.
Maintenance Tips
- Dust frames regularly to keep colors vibrant.
- Swap prints seasonally for a fresh look.
- Adjust layout if you acquire new artwork.
Personal anecdote: Every few months, I rotate prints or add small new frames. Keeps the wall feeling alive and never boring.
Quick Checklist for DIY Wall Gallery Success
- Measure and plan first.
- Choose a cohesive theme.
- Gather frames and artwork wisely.
- Experiment on the floor.
- Use paper templates for perfect placement.
- Mind spacing (2–5 inches).
- Level and hang confidently.
- Mix prints and textures thoughtfully.
- Consider wall color for contrast.
- Maintain balanced visual flow.
- Add personal touches.
- Refresh and maintain regularly.
Final Thoughts
Creating a DIY wall gallery doesn’t have to be intimidating. With a little planning, some strategic placement, and a touch of creativity, you can craft a wall that’s both beautiful and personal. I promise—no more random holes, crooked frames, or stress-induced panic.
Whether you’re working with wall art layout, picture hanging tips, or home styling DIY ideas, remember that planning, spacing, and personal touches make all the difference. Your wall can reflect your style, tell your story, and give your home a curated, cozy vibe—all without the mess.
So grab your frames, sketch your layout, and start building your perfect wall gallery. Trust me, future-you (and your walls) will thank you. 🙂