The Art of Homemade Cannoli: A Guide to Crafting Authentic Italian Pastries
Introduction:
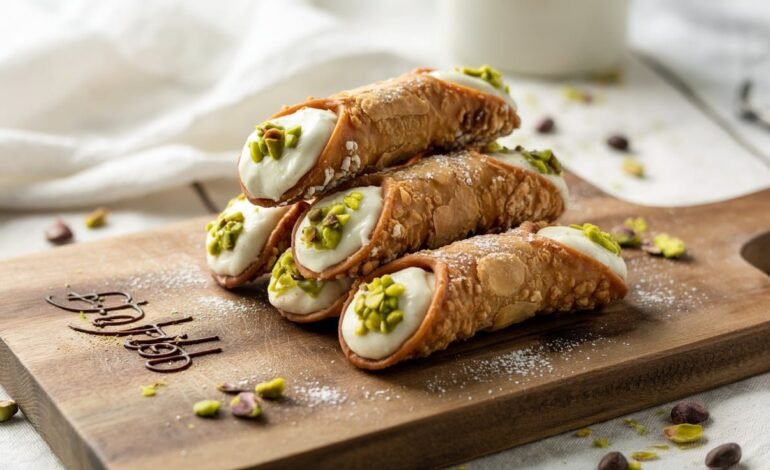
Cannoli are more than just a dessert; they are a culinary emblem of Italian tradition and celebration. With their golden, crispy shells and a rich, creamy filling, they have captivated palates across the globe. This comprehensive guide and recipe will empower you to create these classic pastries in your own kitchen, allowing you to experience the true taste of Italy. We will delve into the history, the science behind the perfect shell, the art of the filling, and offer a detailed, easy-to-follow recipe for a truly unforgettable homemade treat.
History and Heritage of Cannoli:
The story of cannoli is deeply rooted in Sicilian culture, tracing its origins to the region’s rich culinary history. These “little tubes,” as their name translates, were a staple during the Carnevale season, symbolizing abundance and celebration before the start of Lent. As Italian immigrants brought their traditions to new lands, cannoli became a beloved icon of Italian-American cuisine. The dessert’s enduring popularity is a testament to its simple yet perfect combination of textures and flavors—a harmonious marriage of a crunchy shell and a velvety filling.

The Ingredients: The Foundation of Flavor:
The secret to a perfect cannoli lies in the quality and balance of its ingredients. The shell’s dough is deceptively simple, made from a blend of flour, sugar, and a hint of cocoa powder for depth. The inclusion of a small amount of white wine or vinegar is crucial; the acidity helps tenderize the dough and creates the signature bubbled, crispy texture when fried.
The filling is where the cannoli truly shines. While the traditional filling is a smooth mixture of ricotta cheese, powdered sugar, and a touch of vanilla, it serves as a canvas for creativity. Authentic recipes often use sheep’s milk ricotta, which is richer and sweeter than its cow’s milk counterpart. Toppings and mix-ins like mini chocolate chips, candied orange peel, or chopped pistachios not only add flavor but also a delightful textural contrast.

Mastering the Shell: A Technique of Precision:
Crafting the perfect cannoli shell is an art that requires attention to detail. The dough must be rolled to a thinness of about 1/8 inch to ensure a light and crispy result. A pasta machine can be used to achieve a consistent thickness, making the process more efficient. When wrapping the dough around the cannoli tubes, a secure seal is vital to prevent the shells from unwrapping during frying. Using a small amount of egg white or water on the seam will ensure they hold their shape perfectly.
Frying is the most critical step. The oil must be heated to the ideal temperature of 350°F (175°C). Oil that is too hot will burn the shells before they are cooked through, while oil that is too cool will result in a greasy, soggy shell. The shells should be a beautiful golden-brown and feel light and crisp to the touch. Once fried, they should be drained on a wire rack to prevent them from becoming soggy.
The key to a silky-smooth cannoli filling is properly draining the ricotta cheese. This step removes excess whey, preventing the filling from becoming watery and ensuring it maintains a thick, pipeable consistency. To drain the ricotta, place it in a colander lined with cheesecloth and let it sit over a bowl in the refrigerator for several hours, or even overnight.
Once the ricotta is drained, it should be beaten with powdered sugar and vanilla extract until it’s light and fluffy. This is also the time to incorporate any desired mix-ins. For a truly authentic touch, consider adding a hint of cinnamon or a dash of finely grated orange zest.
The Art of Presentation and Serving:
Presentation elevates the cannoli from a simple dessert to a work of art. The classic dusting of powdered sugar adds a touch of elegance, while a sprinkle of vibrant green pistachios or a few pieces of red candied cherry create a striking visual contrast. For a truly professional look, dip the ends of the filled cannoli in melted chocolate before garnishing.
To maintain the shells’ signature crunch, it is crucial to fill the cannoli no more than an hour or two before serving. The creamy filling will eventually soften the shell, so filling them just before guests arrive is a surefire way to ensure a perfect bite every time.
A Step-by-Step Homemade Cannoli Recipe:
This recipe provides a classic approach to crafting a perfect batch of cannoli, featuring crispy, bubbled shells and a rich, creamy ricotta filling.
Yields: 12 cannoli Prep Time: 30 minutes Chill Time: 30 minutes Cook Time: 30 minutes Total Time: 1 hour 30 minutes
Ingredients:
For the Shells:
-
1 ½ cups all-purpose flour
-
2 tablespoons granulated sugar
-
½ teaspoon salt
-
1 tablespoon unsweetened cocoa powder (optional)
-
1 large egg yolk
-
2 tablespoons unsalted butter, softened
-
¼ cup white wine or vinegar
-
Oil for deep frying
For the Filling:
-
1 ½ cups whole-milk ricotta cheese, drained well
-
¾ cup powdered sugar
-
1 teaspoon vanilla extract
-
½ cup mini chocolate chips (optional)
-
¼ cup finely chopped pistachios or candied orange peel for garnish
Instructions:
-
Make the Dough: In a large bowl, whisk together the flour, sugar, salt, and cocoa powder. Create a well in the center and add the egg yolk, softened butter, and wine or vinegar. Mix with a fork until a shaggy dough forms, then turn it out onto a lightly floured surface. Knead for 5-7 minutes, until the dough is smooth and elastic. Wrap in plastic and refrigerate for at least 30 minutes.
-
Roll and Cut the Dough: Divide the chilled dough into two pieces. On a floured surface, roll one piece into a very thin sheet, about 1/8 inch thick. Using a 4-inch round or oval cutter, cut out circles or ovals.
-
Shape and Fry the Shells: Heat 2-3 inches of oil in a heavy-bottomed pot or deep fryer to 350°F (175°C). Loosely wrap each dough piece around a cannoli tube, overlapping the ends. Use a dab of water to seal the seam. Fry the shells, a few at a time, for 2-3 minutes, turning them to ensure even browning. When golden and bubbly, remove with tongs and place on a wire rack to cool. Once cool enough to handle, carefully slide the shells off the tubes.
-
Prepare the Filling: In a medium bowl, combine the drained ricotta, powdered sugar, and vanilla extract. Beat with an electric mixer until the mixture is light and smooth. Gently fold in the mini chocolate chips if using.
-
Fill and Garnish: Transfer the filling to a piping bag with a wide tip. Just before serving, pipe the filling into each cooled cannoli shell, filling from both ends. Garnish the ends with chopped pistachios or candied fruit.
-
Serve: Serve the cannoli immediately to enjoy their optimal crispness.
Nutritional Information (per serving):
-
Calories: 250 kcal
-
Fat: 12g
-
Protein: 5g
-
Carbohydrates: 30g
Conclusion:
Making cannoli at home is a labor of love that is incredibly rewarding. It’s an opportunity to connect with a rich culinary heritage and create a dessert that is far superior to any store-bought version. The combination of a perfectly fried, crispy shell and a luscious, creamy filling is an experience that is both timeless and deeply satisfying. This recipe offers a pathway to mastering this classic Italian pastry, allowing you to share a piece of this delicious tradition with family and friends. So, roll up your sleeves, embrace the process, and prepare to be rewarded with one of the most delicious desserts you will ever make. Buon appetito!